Saturday, March 14, 2015

Granny's Attic update

I'm 10 squares in to the Granny's Attic afghan now and I think it will be a great looking afghan when complete.


I've figured out a way to make the squares in a way that I'm happy with.

I change colour in the diagonal corners in the ch2. One chain is one color and the second chain is the second colour.  Repeat. I have to start one colour mid row so that there is a chain in the corner to switch colours with, but I don't mind.  I find it leaves a cleaner look, the first squares where I followed the pattern and had ch2 in the same colour peaked through the stitches, and for me, that's very annoying.

There are 48 squares in the afghan, so the colour combinations will be repeated - but I need to get a few more colours - perhaps some green.

Sunday, March 8, 2015

Grannys Attic for Gina

I have a love hate relationship with this afghan!


I love the design and colours, it reminds me of stained glass, but I really hate the amount of tail ends to deal with! It's like baking, I love making the food but I don't want to do the cleanup :)


I knot and weave in the ends. Some people only weave in the ends, but that makes me a bit worried. Little tails start to show with daily wear, washing, drying, finger plucking etc, and I don't want to look at something I've made or something I love and find a big hole where some stitches have been pulled out. I'd rather have a knot (or a tonne of knots) and feel secure in knowing my project can handle being loved. Sure, some tail ends will show, but they can easily be woven in again…it's not so easy to fix a hole.

The first square of this afghan was a bit frustrating, it would of been SO MUCH EASIER had they explained why they were switching colours where they do, but they don't, so I'll tell you why I think and what eased my frustration.

It seems easier to do the following 3 dc, 2 ch, 3 dc, 2 ch switch colour 3 dc, 2 ch, 3 dc, 2 ch, sl st closed, BUT…this is what I think - the reason they don't do this is because the slip stitch to close makes it almost impossible to insert the hook into the chain for the the next round of dc's.   Maybe I don't slip stitch correctly or too perhaps too tightly, but I'm happy with my reasoning.  Still not so happy with the amount of tails though!

Friday, March 6, 2015

Hexagon Afghan for Jace

I love this pattern and love the colours, there are so many choices for doing this afghan pattern and each combination makes it look so different! I found this on Ravelry - It's Attic24's Hexagon How-To pattern. It links to her website.  She also explains the join-as-you-go method of connecting the hexagons.

Hexagon Quilt

So many people have done this project that I took inspiration from their colour choices. I decided to make this one for my grandson Jace, but somewhere along the line I'll be making a grey version for myself.

There are 5 colours - I used a combination of Red Heart 'With Love' and Bernat Premium.  The Bernat is thinner and lighter than the Red Heart, but I didn't realize it when I first started. I think it will still work out fine though.  I also used a 4.25 mm Boye Hook.

25 Hexagons
I modified the pattern a bit and did 3 double crochets instead of the clusters, it was easier to crochet without paying attention! I love the look and don't think it changes much from Attic24's pattern.
I finished attaching all the hexagons I had originally made, so for now, this quilt is on the back burner, at least for a few days since I have 3 on the go right now.

I think I have a bit of OCD - now that this one is complete (all the circles are now attached as hexagons) I can complete the next quilt up until it's parts are done and so on. Once I've caught up on all 3, I can then start making all the circles again for this one!


Hexagon Quilt 52 hexs
52 hexagons
Red Heart - Tan (1308)
Red Heart - Iced Aqua (1502)
Red Heart - Aran (1303)
Red Heart - Chocolate (1321)
Bernat Premium -  Dark Grey Heather (58003)

There is no dye lot for the Red Heart, but not sure on the Bernat - have to check that (but it's a bit late now!)

Tuesday, March 3, 2015

Jolly Rancher afghan

It reminds me of Jolly Rancher candies in their packages - which is why I call it my Jolly Rancher Afghan.

I'm not in love with this, but I might end up liking it.  Once I get it lapghan size, I'll decide if I want to attach the squares in a different manner than just corner to corner.  Not undo what I've done…I attached as I went, so I'd have to unravel all the white down to the candies again…uh uh, no way.


It's a great way to use up yarn. The centre circles require 2 coffee table lengths (of my square table) to make. There isn't much else you can do with that length - and 3 lengths for the white outside. Technically I'm using yarn from the skien since I don't have any more scraps long enough and I don't have patience to sit around waiting for enough scraps to get this made! That would be a whole lot of other projects and a whole lot of really long tails just to keep working on this one.

I crochet slowly unless I'm rocking along a long row of stitches, so each candy centre takes me about 3.5 minutes. Great little on the go projects when you don't have any time. It's probably the same, or less to do the white.

Hrmm. I think I'm using a 4.25mm hook, guess I'll have to check that out again when I start putting more together!


Wednesday, February 25, 2015

Slouch Hats

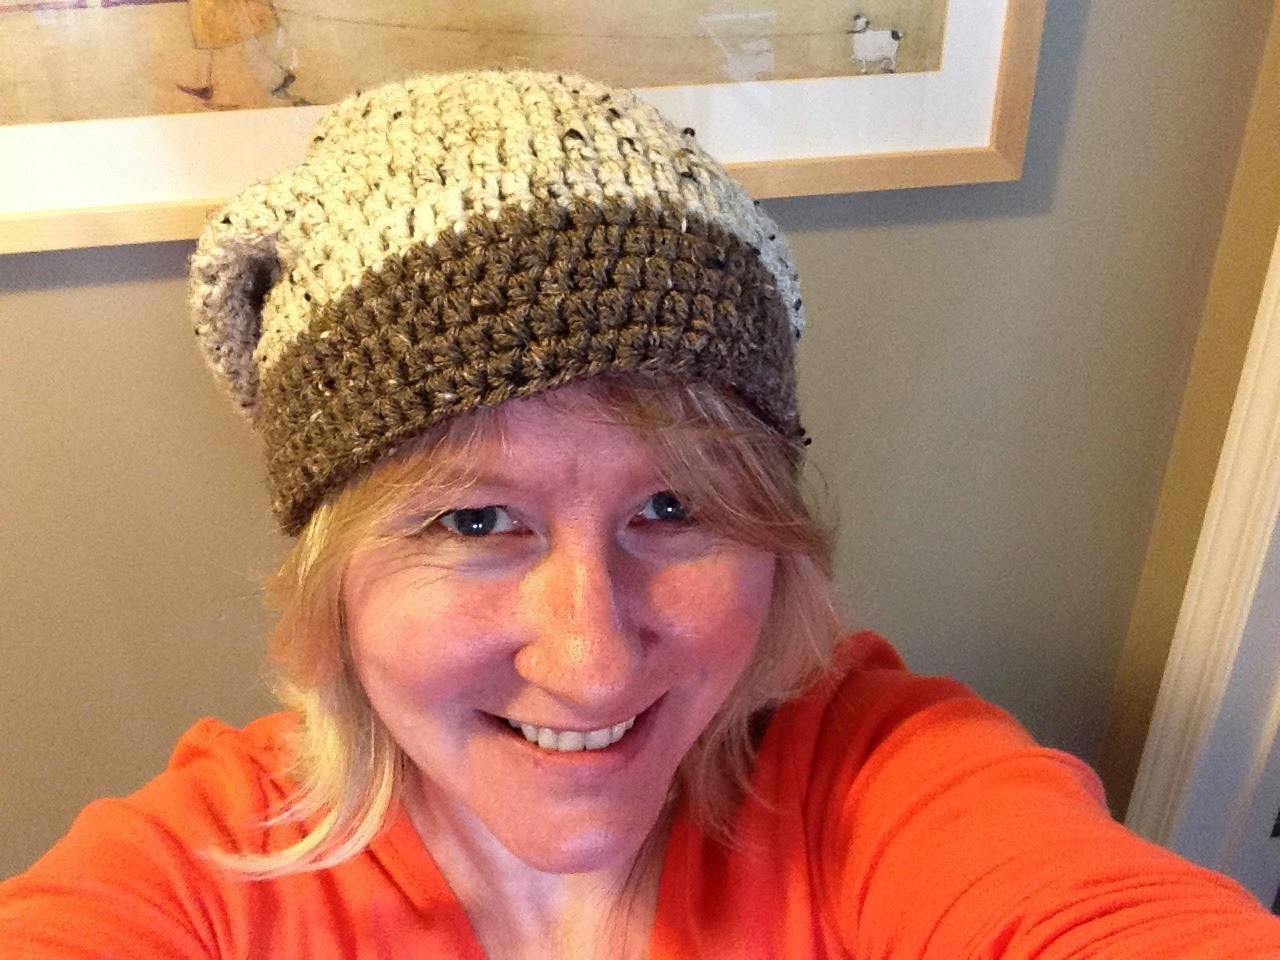
Dyana wanted a slouch hat, so who am I to disagree. I used a basic pattern for a slouch hat / beanie -  12 dc's in a mc, increase and then double crochet in each stitch around etc. I did 20 rows so that it wouldn't be a long hat. I changed to a smaller hook size for her band, and also on the ones I made for myself. For myself I changed up the sc band for hdc too - as seen below.


  • Medium/Worsted Weight yarn  (Vanna's Choice Oatmeal/Barley/Grey Marble..and another worsted)
  • Boyes H/8 - 5.00mm hook
  • Aero 4.50mm hook
HAT: With 5.00mm hook
Row 1: Magic Loop or Ch3 and then 11 DC into the circle (12 DC's total). 


Slip stitch to join each round to top of first dc.

Row 2: Ch 2 (counts as first DC), DC in
same st, *2 DCs in next st* around; join (24 sts)
Row 3: Ch 2 (counts as first DC), 
DC in same st, *DC in next 2 sts, 2 DCs in next st* around; join (32 sts) 
Row 4: Ch 2 (counts as first DC), DC in same st, *DC in next 3 sts, 2 DCs in next st* around; join (40 sts)
Row 5: Ch 2 (counts as first DC), 
DC in same st, *DC in next 4 sts, 2 DCs in next st* around; join (48 sts)
Row 6: Ch 2 (counts as first DC), 
DC in same st, *DC in next 5 sts, 2 DCs in next st* around; join (56 sts)
Row 7: Ch 2 (counts as first DC), 
DC in same st, *DC in next 6 sts, 2 DCs in next st* around; join (64 sts)
Row 8: Ch 2 (counts as first DC), 
DC in same st, *DC in next 7 sts, 2 DCs in next st* around; join (72 sts)
Row 9: Ch 2, *DC in each st around*, join;
Rows 10-19: Repeat Row 9 (Add more rows until you reach your preferred slouch length)


BAND: With 4.50mm hook (gives ridged look – not shown in pictures) 
Row 20: ch 1, *in back loop only, sc in each st around*; join
Rows 21-25: Repeat Row 20


Alternatively (as shown in pictures): Ch1, hdc in each st around*; join, repeat.
Fasten off.

NOTES:
Every circle above will ‘add up’. Row 7 for example: the count starts with 2 dc's (that’s your first ch2 and 1st dc in the same stitch). Then there are 7 dc’s in between each set of 2dc’s.

  • 2dc in stitch, 7 dc, 2dc in stitch, 7 dc etc, until the end, where you would end with 7 dc’s before hitting your first ch2 of the row. 
  • The same goes for all other rows, the last dc’s will be the correct number before hitting the 2 dc's in a stitch.
  • The V's (the 2 dc's in the same stitch) will all line up above each other for each row.
  • The last stitch will snug up against start of the row/ch2.
  • When you get to the rows where you no longer increase, count your stitches to ensure you are not adding an extra stitch each row. I found when doing this, that I no longer had to put the last stitch in snug against the first dc of the row.

Make sure you are joining directly into the top of the ch-2 at the end of each round, not into the gap between the ch-2 and the next DC. Joining into the gap will create a hole.

HOOK SIZE:
For Dy's Oatmeal hat band: I used 4.50 mm hook and single crochet in back loop. 

A 4.0mm hook would be good for a child hat possibly.

The Oatmeal/Barley hat band used 4.50 mm hook – hdc (both loops – ch1 to start row). This was a bit looser, close to what the hat is without a band. Remember to start in ‘next stitch’ and not the ‘same stitch’

The Grey/Grey Marble hat band used 4.25 mm hook – hdc (both loops - ch1 to start row) and is just a smidge tighter than the 4.50mm used in the Oatmeal hat. I prefer this hook with the hdc stitch used. You can see in the picture below - with this hook size the band tightens in slightly compared to the Barley band which runs straighter in-line with the hat portion.

**I prefer the hdc stitch (both loops or backloop) instead of the sc. The hdc doesn’t look stretched and pulled tight like a sc does when wearing. Using a 5.00mm hook when doing sc would most likely be the fix to that – because it would be a larger hook/gauge. 


Monday, February 16, 2015

Skull dog sweaters

I love this dog. He's so dang cute and makes me laugh. So..he needed a sweater or two for winter.


These pictures were taken months ago while he was still acting shy with me and I needed to keep him on a leash just to get a hold of him. Now I'm happy to say - he's an off leash doggie and follows me everywhere. 


This is the Poet dog sweater by Lion Brand (you need to sign in/register to get the free pattern). It's not my favorite to make - I don't like the the shape for trying to size it correctly and it's tough getting the armholes to fit well for a little doggie.

The Skull is from Crochet Nirvana, which I added on to make Chico look badass and make other dogs think twice about messing with him ;)

It is a cute sweater and I made a grey one for Melvin too - and he looks so adorable in it. I think I should of made it longer down the back but I didn't have him to model it for me at the time.

My favorite style of sweater to make uses Granny squares, I think the dogs find it more comfortable, but they aren't really forthcoming in the matter :)


Wednesday, February 11, 2015

Hello Kitty Scarf for December

After I had made the Hello Kitty hat for December,  I stumbled across a scarf pattern that matched. Woohoo! This pattern was created by Made By K. It worked up quickly and December loved the scarf to go with her hat.


The pattern is quite lengthy in the way it is written but it there is lots of information for anyone who needs it.

I'm no designer, so I should keep my yap shut, and thank you to K for making the pattern, but the ear of Kitty is included as a special stitch instead of just being part of the pattern so you have to scroll up to search for it.  

The only other thing I've found on this pattern, is not to get hung up on the exact stitch count when you do the final grey/red outline around the kitty. Just line up your double/triple crochets to be evenly distributed and your set, no need to count the actual stitches and get all flustered.

I really like using Granny Squares for scarves, they are simple and quick to work up.