Friday, November 27, 2015

Artfully Simple Infinity Scarf

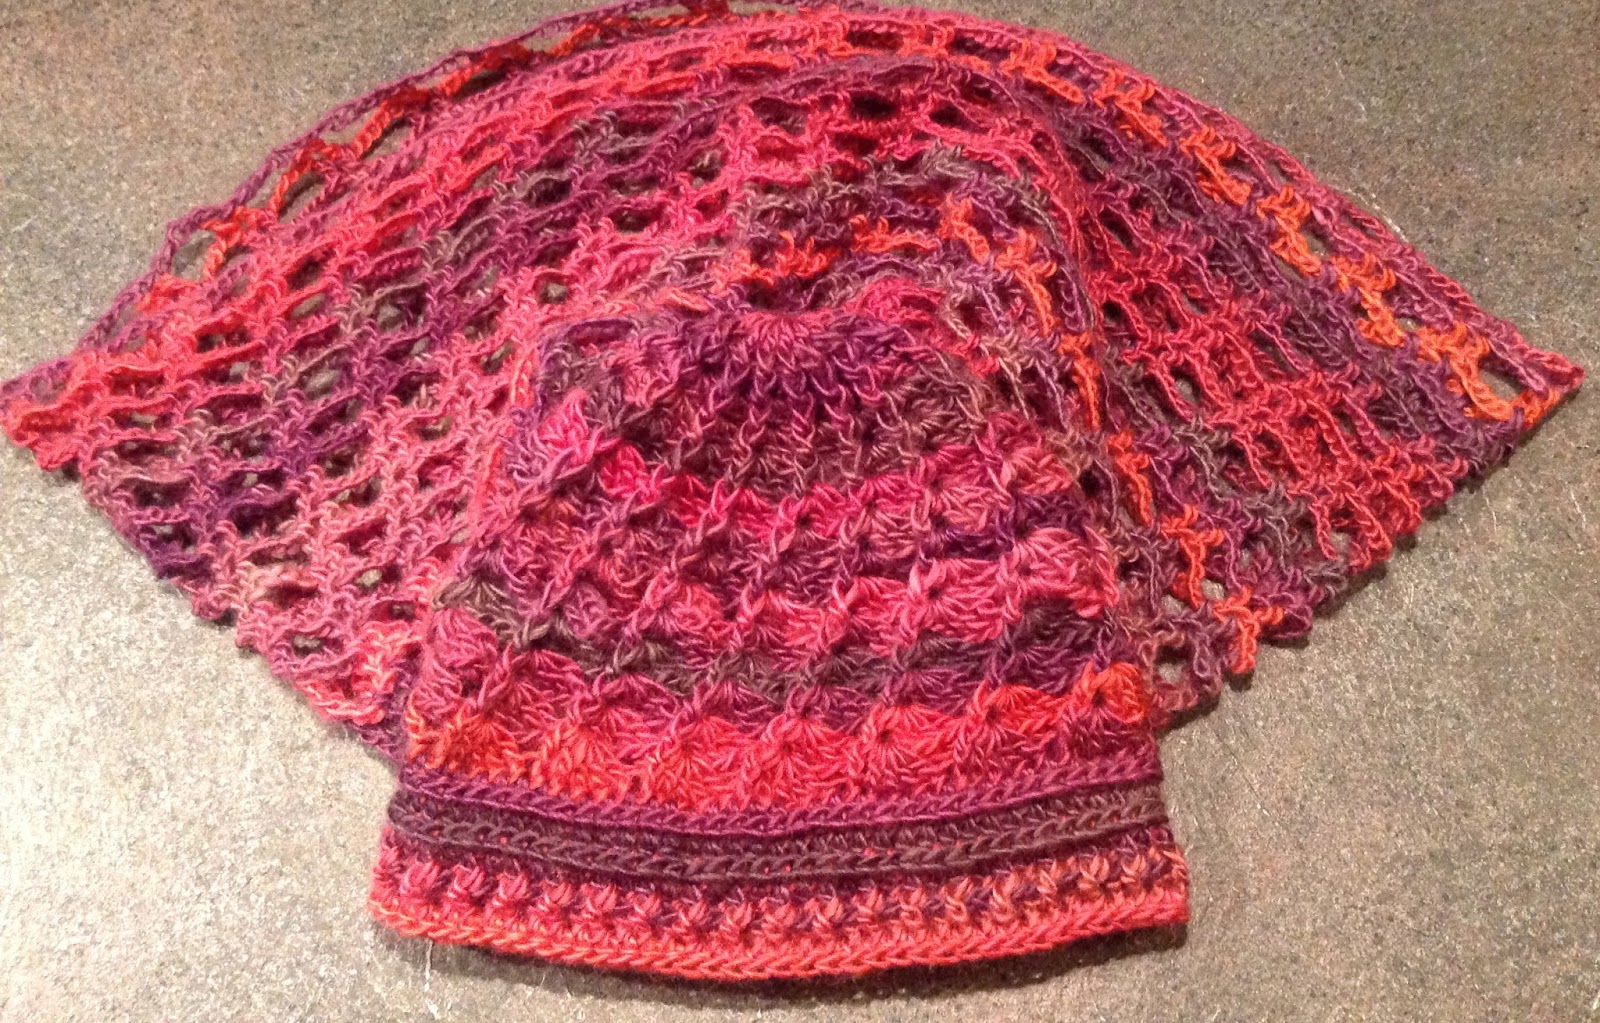
This was my first project using Red Heart Boutique Unforgettable yarn and I fell in love with all of the colors. 

I chose to do the Artfully Simple Infinity scarf in the Winery Color. 


This is the first scarf I've ever made and I really love it with the Unforgettable yarn. 

I love this pattern too. My gauge is a bit off or the original picture just makes it look a bit thicker and longer than what I made. I'll try it again and make it longer, because well...I want one for myself!


I used the same yarn to make the divine hat. It makes a lovely set which I gifted to one of my moms Health care aides for Christmas. I hope she likes it :)


Wednesday, October 14, 2015

Refreshing Throw

I've been working on the Refreshing Throw afghan for a while now.  Not steadily that's for sure. It comes and goes, but overall it went fast when I did work on it. I've finally got to the point of joining all the squares! SO...figured I'd post the progress so far.

I have to admit, this is my favorite square so far. I thought I would get bored of making them, but not yet, and I have plans to use the pattern in another afghan too. Must be love!

I wanted to use the colors that Red Heart shows for the throw, but like yarn companies always do, they've discontinued making the yarn they recommend... how sad. I decided to go with Caron Simply Soft since the colors seem similar and I had them on hand. I just hope it's sturdy enough for the size of the afghan when put together.  It is nice to work with  - except the off white...it's very splitty.
 

I finished the initial squares and then, because I didn't want my joining yarn color to show through to the front, I decided to sc around each square. That way the joining yarn would match and be invisible against all the squares. I had 1 skein left and wasn't sure I would make it around all the squares, but I did with a tiny bit left!


At first I wasn't sure I liked the sc border around the squares, because I really do like the look of the original throw from Red Heart, but the more I see it the more it grows on me. I think I will love it when it all comes together with an outside border.  :) I can't wait until my yarn order gets here from Herrschners so I can finish this.
 

It looks more difficult than it is, and yes, round 3 and round 5 each had a moment of WTF when I read the instructions.

I'm not 100% sure I did round 3 correctly for the very first dc, but I can't see anything wrong when I look at the finished squares...which is good because it's a bit late in the game for ripping anything out. It's as good as it's going to get :)

Friday, September 4, 2015

Pompom Beanie

A friend gave me a pattern for a junior crocheted hat from Lion Brand. She wanted to see how our crochet styles matched up and if she should make something like it for her market booth. 


The pattern is very easy because you crochet a rectangle and then sew it together to make the hat shape. I really didn't like it.  I followed the pattern how it was written, but it was odd that they had you gather the top end up before sewing up the body. This made it all scrunchy to work with and harder to line up the stripes. I knew this before actually doing it, but I followed the instructions as given.

I didn't take a picture of that hat because I didn't like the finished product. It was ok, but the pattern just annoyed me, I guess because I hate having to check how many stitches I have...since I tend to gain or lose stitches on rectangle things. I like to really have mindless crochet be mindless :)

So I remade the hat differently.... OK to be fair it's no longer the same pattern or even close!  hahaha. The only thing the same is the amount of stitches in the starting chain and the hook size.


Row 1: I chained 56 with the aran fleck from Red Heart.
Row 2: Did an hdc in the 3rd chain from the hook. Did my 54 hdc's across, and then did a sl st join to the top of the first hdc of row 2. (my chain 2 which counts as my first hdc)
Round Rows: I just continued crocheting in the round. I went around and around and around until I had a length of hat I wanted. Beautiful, no brainer, no counting, no slip stitches...just watching myself a movie and crocheting myself a beanie :)
Color Change: I decided to change the color up to Vanna's Choice 'Rust' color. I did this in line with where I joined the original chain together in Row 2. So I considered this the back of my hat.


For the color change: I did the first part of the hdc stitch in aran fleck -- yarn over, insert into stitch, yarn over and pull through (3 loops on hook), then did a yarn over with new color and pulled through.

Round Rows: crocheted and watched a bit more movie

2 Decrease Rounds: In line with the first join and the color change below, I did an hdc decrease (hdc2tog), 4 hdc's, then another hdc2tog, another 4 hdc's etc going all the way around until I met up with my first hdc2tog.

My count didn't work, there wasn't exactly 4 stitches when I got to the decrease, but a spacing of 3 between my last one and the one from the previous row was fine enough. Otherwise I would of skipped ahead or moved my last hdc2tog back a stitch or 2. Anyways, I did an hdc2tog using the stitches on either side of the previous rows hdc2tog so they stacked above each other. Did 3 hdc's, then hdc2tog, 3 hdc's, hdc2tog...continued on until I got back to the start and then fastened off leaving a bit of a tail

I wove the tail in and out between the hdc stitches of the last row and then pulled tight to scrunch up and close off the end of the hat.

Using the same Rust color, I did a band of hdc's around the opening of the hat starting again at the 'back' inline with all my other changes. This time I didn't do it in the round, but did the sl stitch, chain 2 up to the next row method.

Tossed on a flower with a button and made a pompom then went to bed :)


Wednesday, August 12, 2015

Denim style granny square afghan

When I first decided to learn to crochet, I purchased a large amount of Red Heart Comfort yarn from Wal-Mart. It's a great price at $9.99 for 16 oz, it's a very thick and sturdy yarn - it doesn't split very easily, and perfect for learning with.  It is coarse and rough, but it fitted my needs.


Go big or go home...I can't jump into something like a dishcloth to learn, I have to jump into something I want right away. To heck with knowing what I'm actually doing! Now later, I love little projects like wash cloths also ...and I am just as proud of them, but back to this story....

My first attempt was going to be a simple queen sized afghan using a dc 3 ch1 on one row, sc ch 3, on the next. It all was going great and I learned a few things. 

  1. The length of the starting chain will not be the final width...things stretch...like used underwear.
  2. As a beginner, it's REALLY REALLY easy to add extra stitches without realizing it...without realizing how really really too late it is. 


I never finished the blanket. It ended up wide enough for a King sized bed and was slowly expanding over each row! I had about 4 feet in length. So I cut my losses and now I have a funny sized 7 or so  foot X 4 foot blanket that is perfect for camping ;)

Now, a year or so later, I came across a pattern for DenimStyle afghan by Bernat.

What can be easier than Granny squares? Well single colour squares, but I figured this pattern would work up quick regardless, and it does.

The pattern calls for a 5.00 mm hook, so I used a 6mm. I'm a bit wild and crazy like that :)

I knew I was going to run out of dark brown, so I focused on making the squares that used the most brown first and then slowly built up adding across a row from there.  I ended up with a 3 X 5 large square pattern with each large square = between 10.5 to 11 inches square.

Unblocked DenimStyle afghan

The original pattern is 5 X 7 squares with each large square measuring 9"X9" (small ones 4.5"X4.5")
Throw: 45 x 63 ins [114.5 x 159.5 cm]     Pillow: 14 x 14 ins [35.5 x 35.5 cm]

Mine ended up being 32 X 53 inches on the inside. I then added a row of 2 tone granny's on the bottom and single colour granny's on the side, bordered by 1 row sc, 1 row hdc in tan, and then a row of hdc in the cream (COL:3132), which brought it out to be about 40 X 61 inches finished.

 
I chose not to weave in the ends and just did simple knots on the backside to keep things secure. I figure the blanket is perfect for camping and will hold up better to abuse that way, so I didn't want to spend a lot of time on it. 


All in all, I'm pretty happy with it and it's a lot more useful like this than as a few large 16oz skeins in my closet.

Monday, June 29, 2015

Butterfly In Spring scarf

The weather was SO HOT this weekend, too hot to actually go outside...which to me is really hot, since I love being outside in the heat.  The air conditioner couldn't keep up either, and even with everything closed and the blinds down it was still sticky and hot inside.  


On the plus side, I did get to finish a couple scarves.

I had 2 skeins of  Loops and Threads - Snuggly Wuggly and not really any idea what to do with them. Actually, I'm really not sure why I purchased them in the first place...maybe for headbands...hrmmm... anyways..

The scarves measure 80" long each and 2.5" wide
(74" + 6" (3" fringe on each side))

Each scarf is 1.4 oz, so I could make 3 from each skein, which is pretty good, but I'll probably make some other scarf now.


Loops and Threads - Snuggly Wuggly - 100% acrylic
5 oz / 141g / 446 yards / 408 meter skein
Light Weight 3
Soft lilac / Soft Gray

PATTERN
  • 4.25 mm hook

Chain 12 (9 + 3)
R1: dc in 4th chain from hook, dc in each chain to end, turn (10 dc's)
R2 - R3: ch 3, 2 dc, ch 6 (skip 4 stitches on previous row), 3 dc's, turn
R4: ch3, 2 dc, ch 3, sc around the 2 ch 6's to capture them together, ch 3, 3 dc, turn


Repeat rows 2-4 until desired length (I had 52 butterflies)
2nd to last row: ch 3, 2 dc, ch 4, 3 dc, turn
Last row: ch 3, 2 dcs, 4 dc's in the chain 4 space, 3 dcs.
Fasten off

Fringe:
Cut 40 - 7" strips of yarn
Attach 2 strands to each dc with a knot


Friday, June 12, 2015

Granny's Attic - complete!

It's done and I think it's beautiful and bright and so wonderfully perfect for someone else's forever home! My evenings are free again!


I had the Granny's Attic afghan on my list of projects I wanted to do, but not for myself. Most afghans don't feel modern enough for me, but I still love the colors and patterns of all of them.

It really wasn't until it was complete that I can appreciate how much the colors pop, especially with a bit of sunlight coming in the window.


The afghan is a good size. and would be great as a large throw for the sofa or on a single bed. It almost fits my queen size bed as it is.  I think 4 X 6 squares would make a nice comfy sized lapghan for the one person. Chico's is 4 X 4 and it's wide enough, but I'd want it a bit longer if I was going to use it for myself.


I really hope Gina is happy with it and her daughter loves it.

ABOUT THIS AFGHAN

17 colors / 8 color combos  + black / 48 squares
Border: single crocheting through both loops, a row of single crochet around plus 2 rows of double crochet
5'4" X 4'1"
WEIGHT:
52 oz (a bit more than that, but close enough)
  • 48 squares to round 6 (including tails) = 2.82 bs / 45.12 ounces
  • 7 oz  black for joining squares by single crocheting through both loops, a row of single crochet around plus 2 rows of double crochet for the border.

COST: TIME
Approx 40 hrs

1 square (to round 6) takes approximately 35 minutes (without tying in tails)
24 tails to tie in per square = 10 mins

48 squares X 45 mins = 36 hrs
joining and border = 3 hrs

COST: YARN
 52 oz / 7 oz per skein = 7.43 skeins
7.43 X $10.11 = $ 75.00 (includes tax)


Monday, June 8, 2015

New stitch pattern dishcloths

I wanted to do two things. One was to learn new stitch patterns and the other was to make some dish / wash cloths.


When I was in Prince George I had picked up some cotton yarn at Michael's on sale - Lily's Sugar & Cream 100% Cotton. They sell it in nice 14 oz skiens.  The ones shown are in off white.

I chose Offset Mesh, Picot Trellis, and Rope Stitch patterns to start with.  The Offset mesh and Picot Trellis patterns are my favorite for this so far.  Hahah, nothing against the Picot Trellis, but it's too airy for a wash cloth and the pattern I used made the starting chain kind of all alone and outside of the repeat, so to me it looks funny.

Offset Mesh
Rope Stitch
Picot Trellis
I made them 10.5" X 10.5" which is close to standard dish cloth size, but I think they are too big for that because they are thicker than a regular dishcloth. I think at this size they make a beautiful spa type wash cloth.

Picot Trellis, Offset Mesh, Rope Stitch